Hi everyone, I am Hana.
I'm a lifelong crafter. I've been knitting and crocheting since I was eight years old. Over the years of exploring the fiber arts I have become increasingly passionate about it
Making gifts for family and friends has taken up the majority of my crafting time, but now that I'm a mom, I'm finding myself poring over patterns for little girl clothes and accessories. There are a million and one cute things to make for a little girl, so how do you choose? I had some Juniper Moon Farm Zooey left over from knitting a shirt from my mom and thought it would be wonderful for grandma and granddaughter to have matching shirts. Because Zooey is a DK weight yarn I knew I needed a pattern that called for that gauge. In my personal stash I had a bit of Berroco Linsey that I wanted to use for a nice color pop. The Linsey was also going to be my back up in case I ran out of the main yarn. Excited to cast on, I headed over to Ravelry to find a pattern that fit my requirements.
My search ended when I found the All in One Sleeveless Baby Top by Marianna Mel. Knit in a DK weight yarn on size US 6 needles, there are options for sizes from six months all the way up to twelve months. It looks great in any color, so I knew I had found my pattern.
Photo credit: Marianna Mel
I loved that not only was it one piece, I had the right amount of buttons in the right size. The only thing I didn't particularly care for was how it was open all the way down. I had pictured more of an actual shirt, but since I was excited to make something I went ahead and cast on. It's a quick and fun knit, great for hanging out on the couch with your baby. I found myself working on the last button hole round before I knew it, while I kept admiring how cute it was, I still wasn't wild about leaving it open all the way down. What were my options? I didn't have enough buttons to continue that way, so that idea was out. What was my other option? The only other choice I could see was to join it in the round and go from there.
I took a good look at the construction of the top and what would happen if I joined it as it was. When I pulled it together it seemed a tiny bit bunched, so after joining I did a make one increase to the left. Increasing by one stitch was enough to allow it to lay correctly without puckering. From there it was a simple matter of knitting till I was happy with how long it was. Five easy rows of 1x1 ribbing completed the shirt. All in all it was a very simple modification yet, that one little change altered the entire look of the garment.
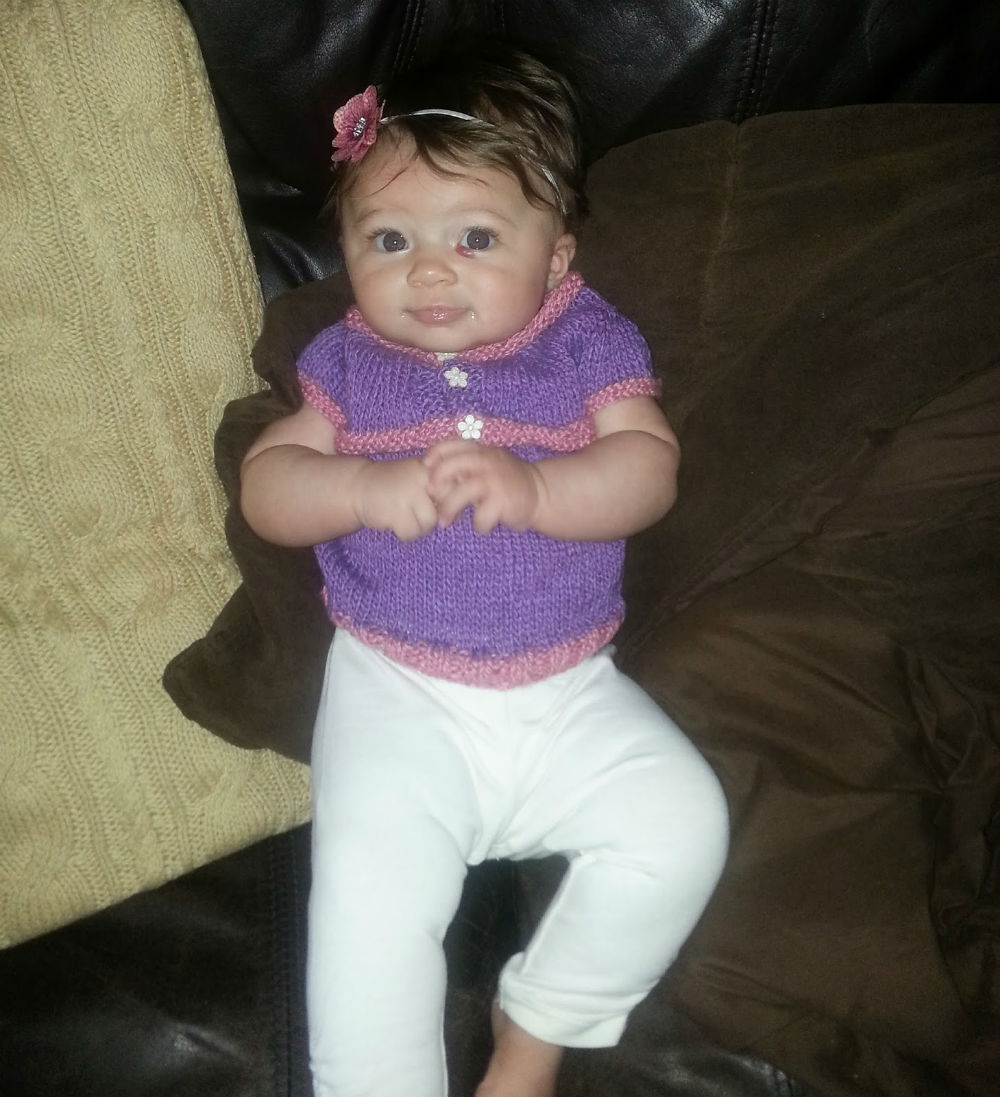
As you can see, little miss Rose is pleased with her new shirt. I am happy with the finished product and with the confidence I've gained. Now I feel like I can tackle more complex modifications without fear.
There are so many gadgets, hacks, and apps out there - how do you know which ones are worth trying, and which are just going to make your life more difficult? Not to fear! Let's follow the "life cycle" of a project and look at some tips to make things go more smoothly for you.
Find a pattern:
Ravelry.com is the place many of our customers start when they're looking for a new project. They have powerful search functions - click on the "Patterns" tab, then select "pattern browser & advanced search" on the left side of the page. This lets you filter the list of more than 600,000 knitting and crochet patterns. By clicking on choices in the various categories - yarn weight, project type, number of yards, etc. - you can reduce an overwhelming variety of ideas to a handful that are easier to decide among. Many choices are free, and others can be ordered and paid for directly through Ravelry. New to the site? Check out the resources on their wiki pages: http://www.ravelry.com/wiki/pages/GettingStartedGuide
Store your purchases: "I have seven balls of this yarn that I bought here two years ago, and I think I was going to make a sweater? But I don't know what pattern I was going to use. Do you remember which one I picked?" Don't let this happen to you! Erika's memory is good, but it's not infallible. When you find a pattern and yarn you like - STORE THEM TOGETHER IN THE SAME BAG. It's such a small thing, but it will save you so many potential heartaches later on. Another tip - when you match your yarn and pattern, add the project to your "queue" in Ravelry. That way you can always go back and see what you'd planned to do, even if the physical objects get separated.
Corral your yarn:
You're ready to start, and things are going well ... until your yarn ball rolls off and starts herding the dust bunnies that live under your couch. There are lots of ways to keep runaway yarn from slowing you down.
Wind your yarn into center-pull balls whenever possible. Many people prefer to wind their yarn just in time to use it. If you're one of them, consider investing in a yarn winder and swift, the two items you'll need to wind yarn quickly and efficiently.
Center-pull balls and commercially wound skeins can be easily "unwound" as you work by storing them in something that keeps them contained when you pull on them. This can be anything from a gallon-size plastic bag that's closed except for where the yarn comes out, to a colander, to a shoebox. There are plenty of beautiful yarn bowls on etsy.com if you want something a little more official, and we've found the yarn butler to be a useful tool to hold yarn for our shop projects.
Project bags are useful, fun, and a little addictive. They're essential for traveling with a project - nobody wants to chase a ball of yarn all over the floor of an airplane - and they make great gifts.
Keep track of where you are in your pattern:
Stitch markers and Post-It notes, highlighters and pencils - all these things come in handy when you're trying to keep track of where you are in a complicated pattern. But what do you do if you've joined the digital revolution and your pattern is on your iPad or tablet? You use knitCompanion! This app lets you "mark up" pdf patterns the same way you would highlight rows on a piece of paper. Many of our customers swear by it.
And while I'm thinking about it, I have a confession to make. Despite my collection of useful and cute stitch markers, I still end up using paper clips, hair bands, scraps of yarn, pieces of dental floss, twist ties, plastic baggie ties, and even pieces of paper jammed onto my needles. Some days my projects look like they were assembled by a magpie. Don't ask me why ... and don't be ashamed if you do the same thing!
Weave in ends as you go:
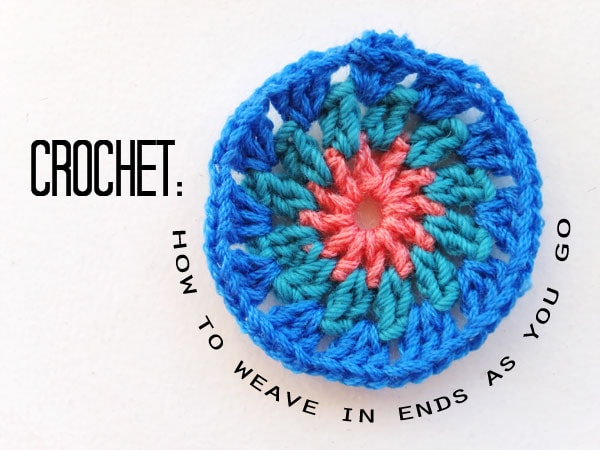
There are few things more disheartening than finishing your beautiful afghan ... and then noticing the hundreds of yarn ends you now have to deal with. Crochet projects are no problem - it's easy to bury the yarn tails as you go, no darning needle required. But knitters should consider taking a break every so often to weave in their ends, especially on projects with lots of color changes. You'll do a neater job if you aren't in such a hurry to finish the project, and you probably won't end up hating the process as much.
Pay attention to yarn care requirements:
The only thing worse than weaving in hundreds of yarn tails? Finishing your project and having it radically change in size or shape the first time you wash it. Ugh! Prevent shrinkage (and bagginess) by paying attention to the care instructions provided by the yarn dyer or manufacturer. These may not be in words - manufacturers have come up with a list of "universal care symbols" which are supposed to tell you all you need to know. Of course, most of us can only remember a few of them, so here's a link to a cheat sheet that shows the meanings of the most common symbols.
So, what's your favorite hack for knitting or crochet? The weirdest thing you've used as a stitch marker? Ever used pencils or chopsticks to replace a lost needle? Share your tips with us in the comments - let's see what you've got!
Wait - don't run away in horror at the mention of gauge! I promise, I can make this fun!
Gauge is just a way of saying "How big are your stitches supposed to be?" It shows up in most patterns, right there near the comments about what size yarn to use and which size hook (or needles) you should try. Not all of us work at the same gauge as the designer, though, so you can't just grab the same hook and yarn and expect it to turn out the same size. Trust me - making a gauge swatch is important if you want the piece you're about to spend hours making to fit. I once ended up with a "slouchy hat" that was more the size of a garbage can cozy. Don't let this happen to you!
Three main things contribute to what gauge you get when you pick up some yarn and start a project: how you tension the yarn, what size yarn you are using, and what size hook or needles you are using. Changing how you tension the yarn isn't real easy to do, and no, a couple of glasses of wine will NOT loosen up your gauge (but they will probably stain your project). Most of the time, you're going to adjust the gauge of your project by changing the size of the hook or needles you're using.
If your gauge swatch used MORE stitches to make up the 4" than the pattern suggested, it means your stitches are too small, and you'll want to go a size or two BIGGER and try again.
If your gauge swatch used FEWER stitches to make up the 4" than the pattern suggested, your stitches are too big, so grab a size or two SMALLER and make another swatch.
Don't be afraid to go more than one size larger or smaller - I'm a loose knitter and sometimes I have to go down FOUR needle sizes to get anything that approaches the gauge of a tight-knitting designer's pattern. But be sure to keep an eye on the feel of the fabric you're making - if you vary too much from the sizes recommended in the pattern, the fabric may end up too holey or too stiff for the project.
The interaction between yarn size and tool size is really interesting. For example, these three samples were all crocheted from the same yarn, but the hook size differs quite a bit.
Now, these next three samples were crocheted using the same size hook, but the yarn size varies from laceweight to bulky.
Generally, to get a flexible fabric, you're going to want to use a hook or needles that are larger in diameter than the yarn you're using - the bigger the discrepancy, the lacier and more flexible the fabric. The only time you want to use a hook or needles smaller than the yarn you're working with is when you want a stiff fabric, such as for a bowl or the brim of a sunhat. I suspect that many of the haters who say crochet is "stiff and unflattering" have never seen projects that were done at the proper gauge. Nobody wants an afghan that you can fold in half and stand up in the corner (like the one I made in college - oops!), but with the right combination of hook size and yarn weight, you can whip out lovely lacy things that will have knitters crying in their half-finished projects. Can you say, cashmere cowl in record time? Because I can.
So, let's talk yarn weights. Yarns come in seven official weights, but not all yarns fall squarely into one size or another. What's worse, something that looks like a fingering weight yarn in the store may puff up when washed and end up more like a DK or even worsted weight - which is why washing your swatch before measuring it is important if you want to be CERTAIN that sweater is going to fit when you're done. You may want to print out the standard yarn size chart put out by the Craft Yarn Council and stick it into your craft bag, just in case you need a reference when you're trying to substitute yarns for a project. It can come in handy when you're trying to figure out whether a chunky yarn is bigger than a super bulky yarn ... or is it the other way around? Meh, who can remember? Let's check the chart: http://www.craftyarncouncil.com/weight.html
At River Colors Studio, one of the best parts of our job is helping you find the perfect combination of pattern, yarn, and tools to make the project you're envisioning. So don't be afraid to ask for assistance or advice - that's why we're here!
When you find that perfect yarn and pattern pairing, it is like finding the end of a rainbow! That's what happened the moment I saw the finished Clementine cowls that were popping up during our Thursday evening social knit. My favorite Clementine FOs were the ones that used 1 skein of Spincycle Yarns Dyed in the Wool and 1 skein of Freia Fibres Handpaints Ombré Sport. The pairing of these two gradient style yarns got to me and I had to cast-on a shop sample right away!
Clementine Cowl Shop Sample
Freia Dusk/Spincycle Pick Your Poison
The shop sample was actually my second Clementine because I knit one for myself and I just loved the soothing hand work of the slipped stitch patterning. After knitting my first one, I did realize the error in my way of not reading all of the pattern instructions (do as I say, not as I do...). So should you decide to cast one on today, follow the suggestion in the pattern and skip the blocking because it does flatten out the fabulous texture of the polka dot pattern.
Have I convinced you to cast one on yet? Yes! Awesome! Here is another tip, go for contrast... not matchy, matchy. Here are some color combination suggestions:
Freia Espresso/Spincycle Overpasses
Freia Dusk/Spincycle Pick Your Poison
Freia Melon/Spincycle Pussywillow
Freia Hard Candy/Spincycle Robin's Egg
Freia Autumn Rose/Spincycle Snow Hero
I just recently ran into The SpinCycle Spinsters at the Maryland Sheep and Wool Indie Pop-up shop hosted by The Knot House (a definite must stop if you are in the Frederick, MD area). I might have taken home 1... okay it was actually 3 skeins of their fabulous wool. I snapped a few images for your viewing pleasure.
At the studio many of us are fans of the designer Jane Richmond. She recently had a knit along for her Arika cowl and I stumbled into it at the very end. I was reviewing the projects on Ravelry after I found the pattern and most people had done it in some type of wool or alpaca. I decided to break loose and use the yarn Norah by Stacy Charles because I wanted to be able to wear the cowl for most of the year rather than just the cold weather. I totally fell in love with the linen and silk blend as I was working with it. I love the swing and the drape that results from the fabric you create. It is kind of funny because some 300+ ravelers have made it to date and few have used something other than wool. Yarn substitution is often a bit of a challenge if you start to actually consider factors other than gauge. In this case I am thrilled with the results and encourage you to venture into something not "so wooly" as you work on projects this summer.